- Login to your myVEBA Account (click here).
- Click "Services", then "My Services" from the menu bar (Note: you must be logged into myVEBA. If you are not logged in, you may be prompted to do so).

- On this screen, you will be able to see all your services with VEBA. Select the email service that you'd like to create a new forwarder for (click the green "Active" rectangle).

- You are now on the “Service Overview” page, where you can see the details of your email service, including the total email accounts, emails created, and domain information.
- Click the blue "Manage Service" button.

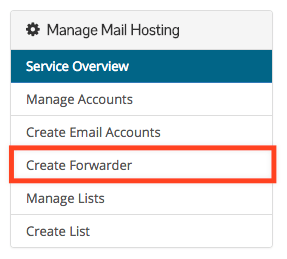
- On the left-hand side, you should see various options, including Manage Accounts, Create Email Accounts, and Create Forwarder. To create a new email account, click the "Create Forwarder" option.

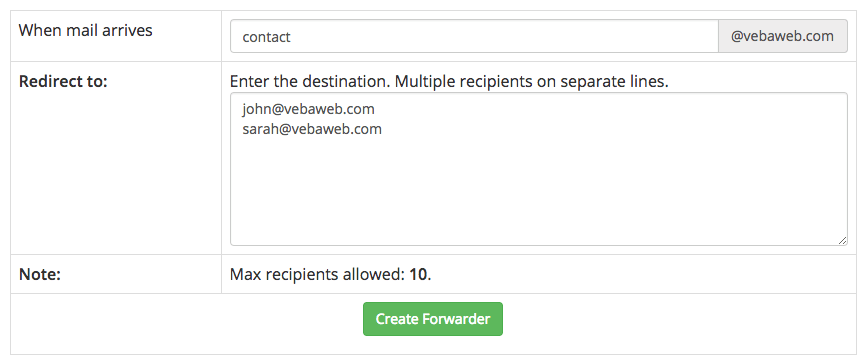
- You will now be prompted with a form to input the details for your new email forwarder.
- In the first box, enter your desired alias (such as contact, info, help, billing, orders, etc). In the second bigger box, enter the email address(es) to where you'd like the forwarded emails to go. See the example below:

- Click the green “Create Forwarder” button once you’re ready.

- That’s it! Your new email forwarding account has been created. Any email sent to your forwarding alias will be sent to the entered email address.
- 0 Users Found This Useful

